大伙知道InDesign怎么添加脚注分割线吗?可能有的小伙伴还不太清楚,那么今天小编就为小伙伴们带来了InDesign添加脚注分割线方法,还不太清楚的小伙伴可以来看看哦。
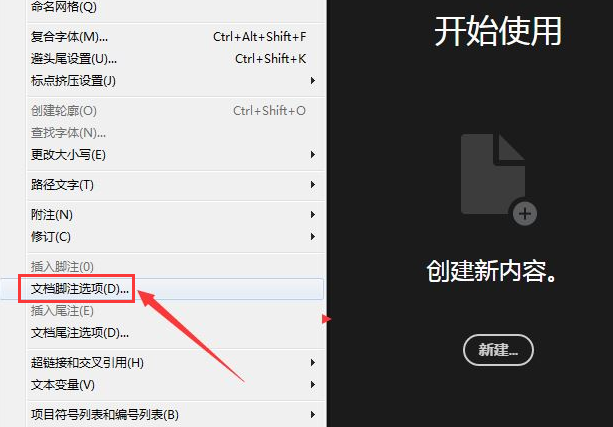
1.首先,打开InDesig软件界面后,点击上方的编辑菜单

2.然后,找到文档脚注选项按钮
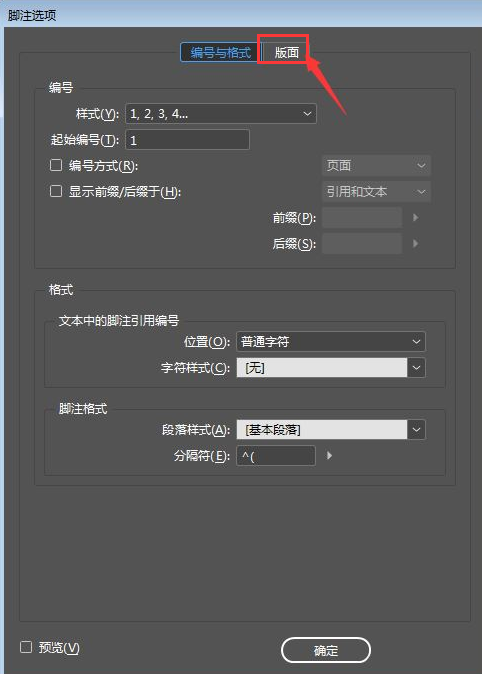
3.接着,将页面切换到版面一栏后
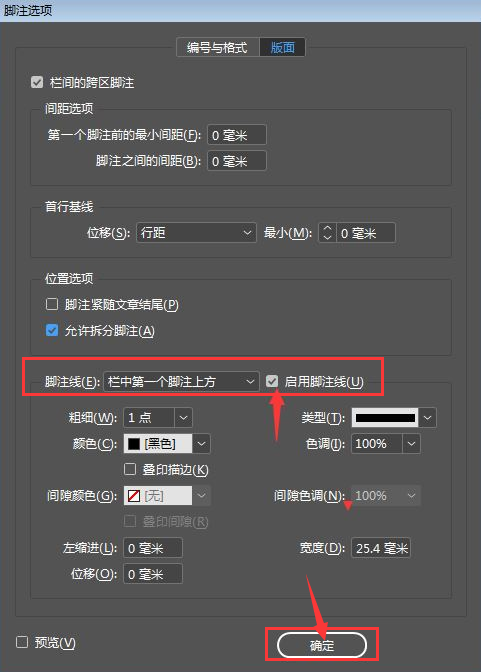
4.最后,鼠标点击勾选启用脚注线按钮保存即可
以上就是小编带来的InDesign添加脚注分割线方法,相信大家都学会了吧。
版权声明:本文章为网络收集,不代表本站立场。文章及其配图仅供学习分享之用,如有内容图片侵权或者其他问题,请联系本站作侵删。